Checking Your Demo Data

Now that we have the demo data how do we know that it is actually working and getting in to the database. It would be rather pointless trying to add the data to the UI if there is no data to add.

If you are using a persistent datasource then you can just use whatever databases tools you normally use to check the tables, but in our case we are using an in-memory database that disappears when the application is exited. Thankfully, however, the H2 in-memory database does have an admin console and SpringBoot sets it up for you when you have the spring-boot-devtools dependency added to your pom.xml file.

To access the H2 Console just start the application in your IDE and then access the console URL and click the connect button. You should not have to change any of the details in the rest of the dialog box.

Once connected you should see your two tables in the left navigator. If you click on the table name the SQL command to view the contents of the table should appear in the command box, just click on Run to load the table.

And if everything is correct you should see your demo data appear.

Now we can finally start adding the data to the UI…

Tagged with: , ,
Posted in Domino To Spring, None

Adding Some Demo Data

Before we can start displaying data in our application we need to add some demo data. You could point the data source to be an external persistent data source that contains test data instead of using an in-memory data source that is lost each time to stop the application or you could load up the in-memory data source with demo data each time the application is started by using either a sql file containing statements to add the data or by writing a script that runs when the application starts that uses the repositories that we built earlier.

For this demo data I’m going to use the data repositories method as it is quick and easy and doesn’t require any sql knowledge.

Lets create a new class called DemoData that implements a Spring class called Application Runner. The class is also annotated with @Component which will allow it to be detected when the Spring Boot application starts.

Next we need access to the repositories. This is done by Autowiring them. Autowiring is a way to setup bean references in your code. Think of this as something similar to managed beans in XPages except you don’t need to edit any xml to get them working. Below is a constructor based autowire of the two repositories.

First I create two private variables in the class that will hold the beans. Next I create a constructor for the class that takes in a parameter for each bean I’m autowiring and then those to the private variables. Lastly I need to make sure I add the @Autowired annotation to the constructor. I could also have written the auto wiring as follows

but this is no longer recommended. If you see code examples like this then you can easily turn them in to constructor autowiring by allowing IntelliJ to convert them for you. Just click the code hint icon that appears when you click on the annotation and pick the constructor.

Now we just need a method that will run when the application runs. Because we extended ApplicationRunner there is a method that we can override called ‘run’ and then we can add as much data to the repositories as we like.

Here I have added one Location and one Person You can add as many as you want in your version. I do like the way that IntelliJ shows the argument names, this makes it really easy for when you next look at the code in a few months time.

One question you might ask yourself is how do we stop this ApplicationRunner from running once the application is in production as we would not want that data showing in that environment. The answer is simple and is all to do with Profiles. I’ll cover profiles in a later entry when we get around to deployments.

Now that we have data we can add it to our UI…

Tagged with: , , , ,
Posted in Domino To Spring, None

Adding Bootstrap To The Frontend

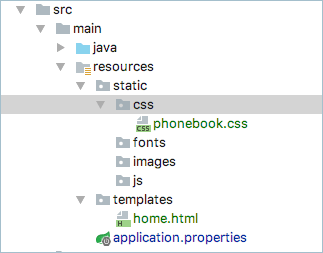
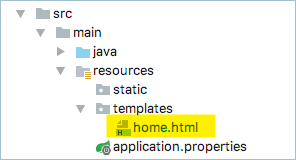
Web applications need more than just html. You also need CSS, JavaScript, Images maybe even Fonts. All of these can be added to the resources/static folder in your SpringBoot application. Here I have added a phonebook.css file that will hold the custom css needed for my application.

And then you can reference them in your html file.

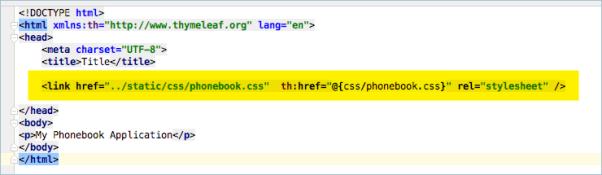
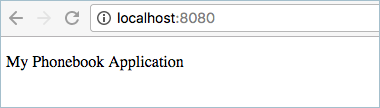
If you look carefully you will notice that there are TWO references to my phonebook.css file. The first is a normal href and it points to a path relative to where my html file is. The second is the th:href which references the css file in a @{}. This is one of the powerful constructs provided by Thymeleaf. As a natural templating engine I could open the home.html file in my browser from the filesystem and it will resolve the correct path to the css file, however when it is rendered by the Thymeleaf processor the original href tag is overwritten by the th:href tag and the @{} rewrites the url to an absolute base path for the application.

I also want to add Bootstrap to my application. I COULD just drop the entire bootstrap archive in to the correct css/js/images/fonts folders and then reference them using links just as I did above for the phonebook.css file. There would be nothing wrong with doing this and it would work perfectly but there is a better way.

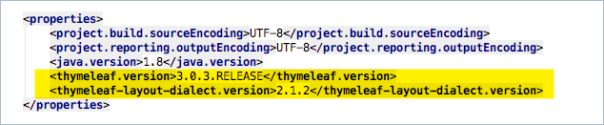
Spring Boot applications are setup to support WebJars. A WebJar is a Java ARchive that contains all the css/js/images/font resources that you need for a particular application. You can add it to your project by adding a dependency to the WebJar that you require directly to the projects pom.xml

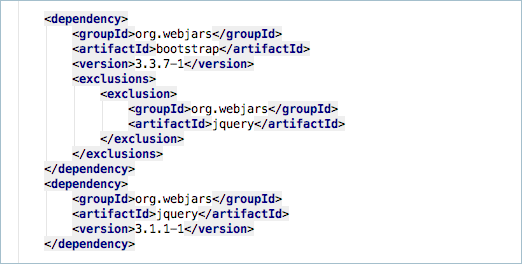
I have added a dependency to bootstrap v3.3.7 and a dependency to JQuery 3.1.1. I’ve also told the bootstrap dependency to exclude its own dependency on JQuery as it is an older 1.11.x version and adding the exclusion will help reduce the final size of the application.

Now I can add references to these webjars to my html file

Again I’m using the double href method. One pointing to an online version of the webjar and the other pointing to the internal version of the webjar. However this still isn’t great. I have to reference the version numbers in both the pom.xml file and the html files. If I wanted to upgrade to a newer version of Bootstrap or JQuery I would have a lot of files to edit.

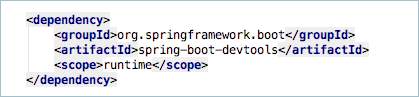
There is an easy solution to this. Just add the following dependency to your pom.xml file.

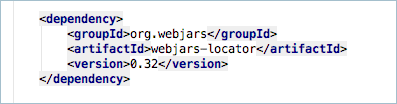
And then remove the version number from the Thymeleaf version of the links in your html file and when it is rendered the locator will automatically dd in the correct version number from the pom.xml file.

While this still don’t update the standard url’s you only really need to use those standard urls if you are developing the html files offline so if you just need to update to a newer version of Bootstrap or JQuery due to a security fix and your testing scrips are done using the running application there would be no need to touch the html files anyway.

Tagged with: , , , , ,
Posted in Domino To Spring, None

Starting The Frontend

For the frontend we are going to be using Thymeleaf. When you add Thymeleaf to your project using the spring-boot-thymeleaf-starter you will get support for both Thymeleaf V2.x and Thymeleaf V3.x. By default the V2.x support is activated by the starter but if you want to use V3.x then you can easily add some properties to your pom.xml file. I want to use V3…

Once you have updated the pom.xml file it it time to create the applications first page. This is done in the resources/templates folder and should be called home.html to match the string returned by the controller we created.

The html file is a standard html file but I have added a xml namespace declaration to the html tag to indicate that I’m using thymeleaf. This helps the IntelliJ html editor to provide extra hints and autocompletion for thymeleaf tags. I have not added any thymeleaf tags just yet but I will in the future. I would also suggest that you update your IDEs code template to add the tag there so that you don’t have to do it ever time in your projects.

If you were to run the application right now it would look fairly boring…


In the next part I will spruce it up a little by adding a simple Bootstrap layout..

Tagged with: ,
Posted in Domino To Spring, None
Archives